Showing posts with label Computer Tips / Tricks. Show all posts

How to Block Ads Online on Google Chrome Forever!!!…

If you’re angry from annoying online advertisements scroll in, bumping up to lose your focus while you’re at work or working for your assignment, watching live stream online or doing anything else. Are you really tired of those creepy advertisements and you just want them away from your computer screen then you’re at the right place because here you’ll know how you can hide most of the annoying online advertisements. However my personal suggestion is to use this guide as information purpose only or when you seriously need to hide online ads.

The reason why I’m telling you that if you block ads for a specific website/blog that might providing free valuable services. You should know that their income mostly based on these online advertisements. So, my suggestion is if you visit websites / blogs to learn something it’s better to keep the ads unblock and that’s appreciable.

As you’re trying to block online ads, I am supposing that this may be the moment  when you’re trying to watch cricket matches from free live streams or something else. OK let’s go through how you can block online advertisements. Since Google Chrome is popular browser among people online more than any other browsers because of it’s speed. That’s why this make me to write a guide for Google Chrome users first . Let’s follow the step-by-step guide:


STEP ONE: OPEN GOOGLE CHROME STORE WEBSITE

I am assuming that you’ve installed and open the Google chrome window on your computer. Now point your cursor to Address-bar or simply press ‘F6’ this will take you address-bar and Type ‘www.Google.com’.


Type the keyword “Google chrome store” this will help to take you to Google Chrome store website


STEP TWO: SEARCH FOR AD BLOCK PLUGIN

You’re at Google Chrome Store website now, to find the ad blocker you’ve to type “Adblock plus” in search box at top left corner of the website and hit ‘Enter’ key.


STEP THREE: INSTALL THE GOOGLE CHROME PLUGIN

After the search it will list lots of Ad blocker plugins for you, however in my experience I have found ‘Ablock plus’ one of the most useful plugin for blocking ads online. It blocks all type of ads even block flash ads as well. You can try other chrome plugins as you like but I recommend you to use Adblock Plus plugin. Click ‘Free’ button to install.


STEP FOUR: BROWSING WEBSITES TO SEE IT’S WORKING

After successful installation of ‘Adblock Plus’ plugins you’ll see a window appearing with message “Adblock Plus has been installed”. It means that Plugins has installed and activated on Google Chrome browser. I usually test whether ad-blocking function is activated or not I use Free Live Stream websites because these come with too much advertisements. I just took of a screenshot of before and after installation of ‘Adblock plus’ plugin.


Live Stream Website before Installation of Ad blocker and advertisements spotted with yellow outlines

image


After Installation & Activation of “Adblock Plus” chrome plugin

image


You can see that ‘Adblock Plus’ is working perfectly on Google Chrome. Now let’s enjoy getting experience of using internet free from any advertisements.  You can unblock ads for specific website by clicking on the red icon of ‘Adblock Plus’ appear on the right of address-bar and uncheck ‘Enabled for this site’.

block-unblock-ads


And again at last, please don’t forget that online advertisement are the main source of income for most of the free websites, blocking ads could harm their earnings, may lead to shutdown their website if everyone is using these plugins. So, whenever possible unblock the ads to keep them providing valuable free services.

Read More

Easiest Way to Record Gameplay in HD Quality…

There was a time when just kids were fond of the games, but today the gaming technology has reached to far from our imagination the real-world gaming experience. Now more adult peoples are involve in gaming than children.  There are more strategically/logical/adventures games are there and people loves to share their gameplay techniques. This tutorial will give all great tips on how you can record any of gameplay with high quality and share them online.

There are about three top leaders in record gameplay in highest available quality are: Fraps, Dxtory, Bandicam. But Fraps is the one the require minimum configuration to do and can easily able to record gameplay in HD quality. In previous article I told you how you can record movies with Fraps but it rocks when recording gameplays. You can check out the gameplay movie I recorded with Fraps here https://vimeo.com/75310586

Recording-Gameplay-

Now let's follow the steps below on how you can record the gameplays of your favorite:

STEP ONE: RUN YOUR FAVORITE GAME
You can run your game if it's shortcut icon available on the desktop or you can run it through:

I)  Start Menu > All Programs > and scroll to your game program.

STEP TWO: RUN FRAPS
Now as you're in the gameplay and run Fraps you need to minimize the game, and I usually try to do this by pressing Windows Key + Desktop to go to desktop or simply press Ctrl+Shift+Esc. and run Fraps from Desktop Shortcut Icon or Start Menu.

II) Start Menu > All Programs > 'Fraps' folder > Fraps program

STEP THREE: CONFIGURE FRAPS PROGRAM
Now you need to do a little steps of configuration:

I) Click on 'FPS' tab and select 'Hide Overlay' option button because I know you don't want to keep seeing the FPS benchmarking while gameplay.

II) Set a Hotkey to capture the gameplay by going to 'MOVIES' tab and under 'Video Capture Hotkey' set the hotkey. I just set Shift+F7 key here.

FINAL STEP: LET'S RECORD THE FAVORITE GAMEPLAY
You're ready to record the gameplay and let's go back to the gameplay we minimized and just press the 'Video Capture Hotkey' Shift+F7 whenever you want to start gameplay record. When you want to stop gameplay recording just press 'Shift+F7' again and the gameplay recording will be finished.


One thing I forgot to tell you that Fraps eats lots of your hard drive that’s why you need lots of hard drive space for recording gameplay for long-time, and possible you may see some lag for long recoding but don’t worry I share some tips to get rid of lags forever in any recoding of gameplay just keep in touch and le't’s enjoy recording favorite moments of your gameplay and sharing online to help people how to clear all the stages of the game :)

Read More

A Best Tool to Get Ultra Smooth Screen Video Recording Experience…

Possibly you may be in a troubling situation due to lags and no smoothness in the video when you try to use Camtasia, Camstudio, etc. to record HD video currently playing  on the media player and you didn’t find them great to do this task 100% well. Now may be you're looking for a better screen video recorder that will help you to record such videos.  So, today I'm going to share you a great screen recording tool that will help you to record ultra smooth screen recording.

The tools that I'm currently using for all super smooth screen video recording is FRAPS. It allows me to record HD movies, gameplay without losing quality. But unfortunately this tool isn't free, however you can get it for $37 with free updates. I just did a video to show the comparison between some of my previous screen video recording tools and this great software Fraps. You can check it out here (http://youtube.com/)

screenshot

Now let's see how I can do ultra smooth recording with these tool but before you start recording please follow the performance improvement instructions given in this link will help for smooth & fast screen recording. Let's follow the step-by-step process below:

STEP ONE: RUN THE FRAPS
This is always the most easiest part for me :) and surely for your too.

1) Click 'Start' Menu > then 'All Programs' > Scroll to 'Fraps' folder then select Fraps program


STEP TWO: CONFIGURE FRAPS TO GET THE RESULTS WANTED
This program looks very simple and it is very simple no doubt just for 4 tabs for this whole program.

General Tab:
I)
I usually check 'Minimize to system tray only' to keep it hide from taskbar while recording. Or sometime I just  check 'Start Fraps minimized' when I'm just recording a specific area for example recording movies/videos

II) Check 'Monitor Aero Desktop (DWM)’ this is the key option will help you to record your whole desktop. But it's only available in the newer version. and this option is buggy I don’t prefer Fraps to do desktop recording very much.

step1

FPS Tab:
IV) Click the 'Hide Overlay' option button you will it on the right so you'll not see the FPS benchmarking on your video as you’re currently seeing below:

step2

fps-overlay

Movies Tab:
V) Set a suitable 'Video Capture Hotkey' whenever you need screen recording I'm using 'Shift+F10' key.

VI) Under 'Video Capture Setting' select the suitable fps most of the time for movies you can use 25-30 FPS or might be 60 fps if it's HD video or a gameplay. I forgot to mention that this tool can help you to record your gameplay (such you’re playing FIFA 2011 you can easily record with this tool.)

VII) Under 'Sound Capture Settings' if you want to narrate your voice with microphone check 'Record external input' mostly you'll do this if you're creating a tutorial for playing games otherwise just uncheck it and check 'Record Win7 Sound’ for recording movies.

VIII) Check 'Hide mouse cursor in video' if it's movie/gameplay

Note: Most Importantly If you’re going to record a long video then you should first select a drive location where you’ve some amount of hard drive space and to do this click ‘Change’ and browse the location then click ‘OK’.

step3


FINAL STEP: LET'S READY TO START RECORDING YOUR SCREEN
Now be prepare you'll to do the first screen recording experience with tool:

IX) Just press your 'Video Capture Hotkey' I set Shift+F10 to start recording but you'll notice there is no sign of  recording on the screen. but it's recording and let’s enjoy recording videos on your screen.

I usually use this for recording PowerPoint videos with sync audio on iSpring then record in HD format with this great tool. I have already used Camtasia, Camstudio (Free), Snagit (for Low-end computers) but I didn't find such ultra smooth screen video recording with these tools. There are some tricks that you need to do to improve the video recording performance, but I'm sure you'll not find such smoothness as compare to recording with this tools, possible some may not agree no doubt.

Read More

How to Know Which PC Device Drivers are Outdated ???…

For several days I had faced the continuous BSODs (Blue screen of deaths) on my PC. I didn't know what thing is causing this big headache for me. I tried keep googling to find a best a solution and after many days I found that my outdated device drivers are causing this problem. But I didn't even know how to know which driver is outdated. So, today I'm sharing a you a really nice utility that can help you to find outdated drivers from your PC and and even install updated ones.

The program I'm talking about is Driver Reviver which isn't fully free but you can able to check outdated drivers with the free version of Driver Reviver. You can download the free version of this software from http://www.reviversoft.com/driver-reviver/ and click 'Download now'. Install this program I usually install most of my programs in C: drive because I have lots of space in that :)

After installation of Driver Reviver you're ready to find your outdated drivers with this free version, and If you really want to save some more time with automatic installation of updated device drivers then you have to spent some money just $29.99, but you can able to find the recent drivers without paying for this program, and method will be to find recent ones manually. OK let’s move on and follow the steps to detect outdated drivers and to update them manually.

STEP ONE: OPEN DRIVER REVIVER PROGRAM
1) Go to Start Menu > Click 'All Programs' >  scroll to 'RevivorSoft' folder > select  'Driver Reviver' > then select 'Driver Reviver' program

Driver-Reviver-Screenshot-urdu

STEP TWO: DETECTING OUTDATED DRIVERS WITH THIS UTILITY
Now you have to click 'Home' tab of this program where you'll see your PC Health which depends on the updated driver and as you can see it' showing 'Excellent' since I already updated my PC's device drivers. In this step all you need is to click 'Start PC Scan now' and wait until the process completes.

Driver-Reviver-Working

STEP THREE: FINDING THE LATEST DEVICE DRIVERS ONLINE
As Driver Reviver completes finding outdated drivers it will show the message 'Action Required' and number of device driver that are outdated in the ‘Home’ tab. Now, let’s find their latest versions online. Here I'm giving you some useful websites which you help getting the updated versions of your PC’s outdated drivers.

1) CNET - http://download.cnet.com/windows/drivers/
2)  Device Identifier - http://www.driveridentifier.com/
3) Driver Guide - http://www.driverguide.com/index.php
4) If you have any branded machine like Acer, Compaq, HP, Dell,  Gateway then you can simply go to their website and get the latest versions.

As you know that finding drivers online manually really eats time. But the good news is I'll give you some useful tips in coming articles about finding PC device drivers online more efficiently which will save some of your time. I hope after updating device drivers you’ll see the better performance of your computer.

Read More

Three Easy Steps to Run Several Skype Accounts At a Time

Probably you've signed up for a Skype more than once, may be one for your family and friends and other for business clients, etc. So, when you're looking to run Skype program to sign signed in for the 2nd account or so at the same but normally if you just try to run it by going to Programs under Start Menu. You'll can't able to get it run. Today I'm going to show you easily you can run Skype program more than one for  other Skype accounts.

skype-window

I'm supposing that you're using Windows 7. Let's follow the instructions:

STEP ONE: GO TO RUN COMMAND WINDOW
Go to 'Start' Menu > Type 'Run'   or simply press 'Windows Key' + 'R' this will open the  'Run' command window.

Note: Whenever you install any program mostly it installs in C:\Program Files or C:\Program Files (x86) I'm assuming your program in install in C:\.


STEP TWO: TYPE THE PROGRAM LOCATION
In the 'Run' command Please type the location like below:

"c:\program files (x86)\Skype\phone\Skype.exe /secondary"


Note: We use '/secondary' so it means Skype program's another instance will run.


STEP THREE: ENTER ACCOUNT DETAILS AND SIGN IN
Now Skype's sign in window will appear just put your accounts detail you're done.


When quitting the one of instance of Skype program then point your mouse cursor to Skype program on the taskbar, you'll able to see the window thumbnails of running Skype programs, just click one of the Skype you want to quit, after that right click on Skype icon on the taskbar then select 'Quit' and then again confirm 'Yes' on the dialog box that will appear next. And this is how you'll close one of Skype program and other will remain open. That's it.

Read More

Get Best-Matched Subtitles for Your Favorite Movie Without Wasting Time on Syncing it Manually

Now you’re very happy because you’ve got the the DVD of your favorite movie, But unfortunately the movie didn’t come up with subtitles. And the chances are you will not understand some or many parts of the movie because you might not understand what the actors are saying due to the speed of words, pronunciation, etc. even if you’re a native English speaker. On the other hand, some people only like to watch movies with their own native languages. In this tutorial you’ll know how you can get the best-matched subtitles for the movie without manually finding and syncing them.

syncing-subtitles

For most of movies the best-matched subtitles are usually available in which you don't need to syncing the subtitles manually. But I have seen many tutorials in which people are telling to sync the video manually if timing isn't right or have delay in it. It's possible the subtitles you've isn't synced for your DVD due to FPS.

But, my question is why to sync. the subtitles of videos that are already synced by the professionals since these are most popular movies. However, you will need to sync. the movies that are edited/censored for family audience, etc. Let's come to this time-saving solution.

STEP ONE: LOAD THE MOVIE IN VLC PLAYER:
I am assuming that you've installed the latest version of VLC If not just go the VLC website and download it now.

  • Now Run the VLC Player
  • Goto 'Media' Menu > 'Open File' or simply press 'Ctrl+O'
  • Browse the movie for which you’re looking best-matched subtitles and Press 'Open' button


STEP TWO: DOWNLOAD THE TIME-SAVING PLUGIN
Now here is the real time-saving that will remove your headache of finding and loading synced subtitles instantly. Just download VLSub from here the plugin designed for VLC Player to do this job. The coder really deserves the T
hanks.

After installing this VLC plugin you will able see this plugin at the bottom under 'View' menu with text 'VLSub x.x.x'. This plugin will instantly allows you to search and download subtitles for any available language. For this you've two search options available 'Search by hash' and 'Search by name'. 'Search by hash' option is what I love the most and It really help in finding best synced subtitle.

  • Since you've loaded the movie now you just need to click 'Search by hash' it will come up with the best synced subtitles. Try some of these by pressing 'Download select' button and it will immediately load up in the movie. And Let’s Play and Enjoy!

I hope now you've synced subtitles for the movie you're looking. Have a great fun with the movie you're watching.

Read More

Top 10 Time Saving Keyboard Shortcuts for Windows You Should Know

If you consider yourself the one who always prioritize saving time as the most important priority then here is the good news for computer users like you. While using keyboard shortcuts in your daily computer routine you can save you a lot of time. You can make yourself productive by using keyboard shortcuts and can make yourself focused on the work. Usually people lose their focus when they put off their hands out of the keyboard.

It's a fact that everyone don't like to use the keyboard shortcuts. However some people prefer to use the keyboard as much as they can instead of using mouse for some tasks. Because these people's already experienced that the work done by mouse could take more time than the work done by the keyboard.


What is a Keyboard Shortcut?

You can perform a keyboard shortcut by pressing specific keyboard keys together to repeat a specific action. This action completes by pressing a modifier key with a character key.


Do-You-Know_thumb4

According to research at Brainscape using keyboard shortcuts can save about 64 hours per year or 8 working days.


A Practical Example of using Keyboard Shortcuts:

Let me tell you an interesting thing that the most productive technical support companies or the organization where the data entry work done on a big scale they try to limits their employees to use keyboard for most of their computer work and this can be possible only when bound themselves using keyboard shortcuts. These kind of employees are usually productive for the company because they keep their focus on the work.


Do You Want to Be A Super User?

As you master yourself with keyboard shortcuts and make use of them in your daily routine the peoples like you usually known as super user. Because the use of the keyboard becomes more easier for you than the other people who don't use the keyboard shortcuts. Another reason of that is you made a workflow for computer use with keyboard shortcuts.

Sometimes you don't know the keyboard shortcuts so alternatively you use the mouse and try to find out the required command by scrolling down through menus which waste a lot of seconds to perform just one command that's totally a waste of time. I think this is the main reason of losing focus while you work.

Due to all above reasons, it's important to use keyboard for most of the tasks, and make keyboard shortcuts as part of your daily computer life. In the list below we have given the top 10 computer shortcuts that you should use them in your daily computer life:


1) Ctrl + C or Ctrl + Insert / Ctrl + X (To Cut or Copy any item)

2) Shift + Insert or Ctrl + V (To Paste Copied Item)

3) Ctrl + Y or Ctrl + Z (Undo or Redo an action)

4) Alt + Esc. or Alt + Tab (Switch Between Windows)

5) Alt + F4 (Close the Window)

6) Ctrl + W (Close the Tab – Used normally while using internet browser)

7) Ctrl + F (Search for items)

8) Windows + R (To Open Run Command)

9) Ctrl + Backspace (Delete a Word to the left – while text editing)

10) Ctrl+Shift then Left/Right Arrow (To Select words – while text editing)

Read More

How You Can Able to Manage All Social Networking & IM Accounts At One Place???

As we're growing in the fast-moving world, quick communication between people is the main concern to keep yourself connected with friends and business contacts in really cheap. On the Internet Instant Messaging Services allow us to send/receive messages in real-time. Since almost all of these services are free that's why there so much demand, however there are lots of choices available to you like Google Talk, MSN, Yahoo, AOL, and especially Skype (which is widely high quality for voice communication between people).

Do-You-Know_thumb4

It’s fact that most internet users use more than one IM Service and Social Networking site.


1) Most Internet Users Use More than One Social Networking Site and IM Service

Its fact that most internet users use more than one IM service. To use their services you to use their website or install their IM clients for each of the IM services. Social networking sites like Facebook, Twitter, where people have to sign in to their website to keep connect and message their friends. So, it would be a headache for you to keep in contact with them if your one friend uses Facebook for IM, and other use Google talk / Yahoo, etc. Thus, Having an account on all major Social and IM website is a good solution, but managing all of them individually is another headache is much time consuming, and it can make you less productive.

Final Image

2) Manage Multiple Social Networking / Instant Messengers Accounts From One App

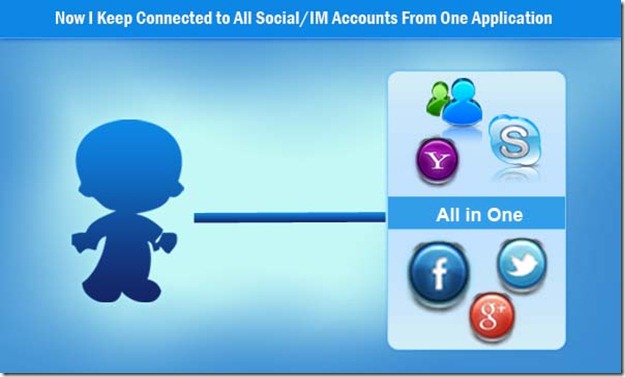
To fill this gap of organizing all major ways of online communication multiple Social/IM services at once we have available multiple Social/IM application for your desktop. In which can manage all your accounts at one place. So, you'll keep connected with everyone whether your friend is on Yahoo / Google / MSN / AOL or Facebook / Myspace no problem. You can even use twitter for tweets and keep updated with your timeline, like or comment on Facebook's updates.

Final Image2

3) Multiple Social Networking / Instant Messenger App Ready to Keep You Connected

There are three major applications available that offer us to use and organize multiple Social/IM accounts at once. The applications are:
* Digsby
* Trellian Astra
* Pidgin

I have used Digsby for about 3 three years and much satisfied with this application, but nowadays it's annoying with "Facebook authentication error' message. At the moment, I am switching to Trellian Astra still I'm much satisfied with it due to it looks and support for Skype's account. I can be easily able to send tweets from my two twitter accounts, one for friends and other for business. So, now it's time for you to start thinking to use multiple Social/IM application to save your time in the future that you consume just for communication.
Read More

How to Use Keyboard Step by Step - Urdu Guide

As we all know that keyboard is commonly used input device for computer, now it's the standard for sending textual information, commands and instructions to the computer. However, today we have also touch-input technology, which can help us to do similar functions. We'll discuss these are in the market and who use them. Keyboard is commonly used input device for this purpose, and it's most recommended to these types of essential tasks.
Now let's talk about the basic components of the keyboards, so you can understand that what you can do with your keyboard.


Let’s Start Exploring Your Keyboard!


1) Insert or Delete Alphabet/Numeric Characters:

1. In keyboard, there are a group of Alphabetic keys from 'A' to 'Z'. After these keys at bottom there is a spacebar button.

2. Above Alphabetic keys, there are Numeric keys in a row from '0' to '9'. These numeric keys have some symbolic keys as well that we mostly use every(@, #, ^, and $).

3. You can see a group of keys like a calculator at the right side of the keyboard which known as 'Numeric keypad'. We use this to insert numeric characters. There is also a 'Num Lock' at the right corner of the keypad which is a toggle button (on/off button). When you turn on Num Lock key, you can type numeric characters and when turned off can be used to as cursor control keys/or a mouse pointer.

4. At very right of the numeric keys you'll backspace button, which used to delete one character to the left.

(Tip: Press Ctrl+Backspace to delete one word to the left).

5. Delete Key usually located on the Cursor-control key, the purpose of this key is to delete single character from right side each time and this continues whenever you press Delete key.

6. Ins or Insert key is a toggle key located near cursor-control keys. Generally, When this key is turned on, and you started to type between characters' type already, then it automatically creates space new between these existing characters. However, if you turn off this key, newly typed character will replace with the previously inserted characters. This operation is known as 'Overwriting'.


Do You Know

While Typing you always see a black blinking vertical bar which moves towards right, it's commonly known as 'cursor', we also call it the insertion point.ack vertical bar blinking and moving towards right when you type, it usually known as 'cursor'. We also call it insertion point.


2) Perform Variety of Task By Applying Function Keys & Shortcut Keys

1. There are two Enter keys in the keyboard, which used to confirm any operation.

2. In very old days, there were two known types of Keyboard 'Enhanced' and 'Non-Enhanced' categorized based on the number of keys in keyboard. Nowadays, Enhanced keyboard is the standard which also contains 12 function keys, which are located above the numeric keys. The main purpose of these keys is to perform specific tasks. At very left of function keys there is an 'Escape' or 'Esc' key, which used to end or quit running operation.

3. A Keyboard has six modifier keys, two Ctrl or Control Keys, Two Alt or Alternate Keys and two Shift keys. These keys are often used to apply shortcut keys.

4. You can use Shift key to change the letter case to lower or capital-case. Suppose if you're typing alphabets and press Shift and C simultaneously, then letter case will change to capital-case. Basically, Shift key does the reverse any task. There is a Caps Lock key which is a toggle key (on/off key). When it's turned on you can type the alphabet letters in Capital-case.

5. Nowadays, keyboard is included with imageWindows Key by which you can apply shortcut keys that are associated with this key. For example, if you just press Windows Key it opens the Start Menu.


3) Navigate Around Items or Objects:

1. Keyboard has a 'Tab' key. This key is used to insert tabulation and also use to move from one object to another in the Operating system's Interface.

2. Keyboard has 8 or more Cursor Control keys. The first four keys are ↑Up, ↓Down, ←Left and →Right. A Home key (Which take the cursor to initial location of any object/item). an End key (Which take the cursor to last location of any object/item). A Page Up or Pg Up key(which take the cursor to one page above of the information currently showing) and a Page Down or Pg Dn key (which take the cursor to one page bottom of the information currently showing).You can also see these keys in numeric keypad, if you turn off Num lock key.


4) Some More Important Keys You Need to Know:

3. A Scroll Lock or Scr lk key in Keyboard used to lock scrolling function, which located near Print screen key.

4. There is Print Screen or Prnt Scn key, captures the screenshot of the currently displayed items/objects in the screen and copies the captured screen to Clipboard (will discuss later).

5. If you want to stop a running process temporarily, then you can press Pause/Break key.

6. A standard keyboard has also included with a imageRight-click Context Menu key opens the menu when use press presses the Right-click button.


This is all in the keyboard you have it in your home or office, office. I'm sure that an average person knows all these things, because if you work in the program like Microsoft Word, Excel then you'll play with all these keys and shortcuts.


Let’s Play the Game!

Now let’s play this game with me by writing comments with the ‘name’ of the key or the group of keys that I marked with a number.

Keyboard-Keys


To Download this article in Urdu version then click below:

Download Chapter 03: How to Use Keyboard Device Step by Step in Urdu

<<< Next: A Simple Introduction to Standard Mouse in Urdu >>>

 
Please read the remaining parts of lesson 3 by clicking below:
2. Introduction a Computer Mouse
3. An Essential Guide to CPU
Read More

Free Computer Learning for Beginners

This is really interesting thing when you first time going to operate your computer. To use your computer may be funny and may be little bit easy and it’s a basic need for us. By knowing how to operate your computer, you need to know about your computer, its components and also about operating system and software. It allows you to know about latest technology and share your knowledge with others. As a beginner you must need to know about every thing how to operate an application. There are many offline and online courses for operating computer. There are few key points in knowing how to operate computer. First of all you should know that computer was built to make human life easy not to make it more complex.
 

If you look at recent past computer had only recommended to organizations. Then time changed and pc computer came in markets for personal use. These computers are divided in two main parts hardware and software. Visible parts of computer are hardware and software is the part that operates this hardware. Despite PC computers, MAC computers are all in one technology based. If we talk about software, operating system and applications come first. There are some important points for beginners to learn your computer.


1. Firstly you should visit the website of the manufacturer of your computer. Select your computer model and then see details about your system. It shows you basic and important information about its comparability.

2. You can also visit the website e.g. Hewlett Packard. After opening this site, click on 'Sources' then on 'all courses' and see all courses regarding beginners. Select a free course from home Office, Microsoft Office and Adobe. This website teaches us about pc security maintenance of computer. It also tells us about a range of software suitable to you.

3. You may call your friend or a family member to help you. While working with friend, it’s easy for you to ask him questions about your problems. There are some basic things while you start to operate your computer. First important step is to create a file it’s an easy step. In each program you open, is a tab of file on the left top of the program Click on it. A window opens then select create option now file is formed by clicking on it. A file may be a picture, report, song anything else which is in digital format. A file is shown is by its name which is followed by a dot (.) or an extension. An extension shows that which type of file is this. For an example, some files are shown by extension of .doc. If we write 'calender.doc', it is a file named calendar and is being saved as a word document. There are many types of extension. You can place files in a folder. In a folder there can be many files. You can download applications which are suitable for you.

As we discussing guide for beginners, it is important to know that in 1990's Microsoft created an operating program and named it 'Windows' .Lately many new versions of 'Windows' came and became famous in operating systems. Despite visiting websites of manufacturers, you can visit third party websites to get important information for beginners. These websites are nice to visit:


Read More

Websites for Free Computer Books

Following are the Websites link from which you can get free Computer Book and Download these Computer Books easily. Some of Computer Books Online. These Websites providing you free Computer e books in Pdf and other formats
 
image
                                  
                                                                                                                                           
Free Computer, Programming, Engineering, Mathematics, Technical Books, Lecture Notes and Tutorials
 
 
Free Online Computer Science and Programming Books, Textbooks, and Lecture Notes
 
 
Learn programming for Free and how to develop and write computer programs and IT applications. Get Free knowledge, information, references, and resources about computers now.  Many Free training courses, tutorials, books, training guides, tips, articles, and helps are available to you.
 
 
Get Computer Book with limited Preview, But you can buy the full version of book.
 
 
OnlineComputerBooks.com contains details about free computer books, free ebooks, free online books and sample chapters related to Information Technology, Computer.
 
 
Cisco certification books, Free Computer Science ebooks, Free Computer Science ebooks download, programming tutorial, online programming,Learn programming for free, system programming,online programming
 
 
Free Programming and Computer Science Books, Technology ebooks and print books for free downloads
 
COMPUTERBOOK.US
Home of the highest quality computer related books all of which are available for free download.

http://www.computer-books.us/

Read More

Let's Download Computer Books, to Keep Continue Learning Process

  •  
    Online library concept

Welcome To All Our Computer Learners,


As you know that there are many Computer books available on the internet related Computer topics, like Computer Software Books, Computer Hardware Books, Internet books, Basic Computer Learning Books and etc. To finding out a Good Quality Book is really hard process. Sometimes peoples want for Computer Books For Free, but getting best computer book is again a hard and time taking process like giving time to the search engines for finding out something like related to your keyword topics. A good Computer Learner want for continuously make a relation between book and computer because in this fast technology changing world everyday we see many new things related to computer, So those want for keep updated with these technologies and these things. A newbie to Computer who didn't know how computers work wants for computer learning books which give step by step simple guide to computer to make his simple understanding with computer. Because Step by step Guide is always the big priority of Computer learners.

To Finding out these things is not really easy, because sometimes you didn't know where to start, you didn't where to find all computer updates, and sometimes peoples by chance get a book related to computer, then start reading this book they will not understand anything because of not have simple step by step guides and these books just a theoretical book didn't have practical guide about computer, if some books have practical guide but in just 2 to 3 pages out of 100. So that the big reasons.

So, Please Don't Be Upset when finding out books for computers on the internet, because a good news for you is that we are providing you a huge list of Free / Cheap Computer Books and Some Books are for Sale, But this is a Big list of free computer Books. These Computer Books have really high quality information, Step by Step easy to understand guides and some book have interactive to make these books really interesting. These books on computer are only concentrated on computer practical not just computer theory. Every Book in this list has a complete solution book for related topic. You can find out here some small computer book for minor topics.

These computer books are electronically formatted computer book in pdf, So when reading this eBooks you can easily make your computer notes after the reading the book for future reminds.

You can Download These Books very easily. So, now you don’t need to go to any Computer book store, computer book shop or any online books place. Because huge online book directory for computer is here and we are providing you all Computer book for dummies to professionals.

Following an arranged list of Computer Book by Topics, You can download these Books by Clicking on Download this Book, So are you ready for getting learned with help of our computer books online:


Free Computer Book Sites

Read More

Followers